
springboot动态配置数据源
简介:
项目开发中经常会遇到多数据源同时使用的场景,比如冷热数据的查询等情况,我们可以使用类似现成的工具包来解决问题,但在多数据源的使用中通常伴随着定制化的业务,所以一般的公司还是会自行实现多数据源切换的功能,接下来一起使用实现自定义注解的形式来实现一下
环境配置:
pom依赖导入
<?xml version="1.0" encoding="UTF-8"?>
<project xmlns="http://maven.apache.org/POM/4.0.0" xmlns:xsi="http://www.w3.org/2001/XMLSchema-instance"
         xsi:schemaLocation="http://maven.apache.org/POM/4.0.0 https://maven.apache.org/xsd/maven-4.0.0.xsd">
    <modelVersion>4.0.0</modelVersion>
    <parent>
        <groupId>org.springframework.boot</groupId>
        <artifactId>spring-boot-starter-parent</artifactId>
        <version>3.2.4</version>
        <relativePath/> <!-- lookup parent from repository -->
    </parent>
    <groupId>com.example</groupId>
    <artifactId>spring-boot-dynamic-datasource</artifactId>
    <version>0.0.1-SNAPSHOT</version>
    <name>spring-boot-dynamic-datasource</name>
    <description>spring-boot-dynamic-datasource</description>
    <properties>
        <java.version>17</java.version>
    </properties>
    <dependencies>
        <dependency>
            <groupId>org.mybatis.spring.boot</groupId>
            <artifactId>mybatis-spring-boot-starter</artifactId>
            <version>3.0.3</version>
        </dependency>
        <dependency>
            <groupId>org.springframework.boot</groupId>
            <artifactId>spring-boot-starter-web</artifactId>
        </dependency>
        <dependency>
            <groupId>com.mysql</groupId>
            <artifactId>mysql-connector-j</artifactId>
            <scope>runtime</scope>
        </dependency>
        <dependency>
            <groupId>org.springframework.boot</groupId>
            <artifactId>spring-boot-starter-test</artifactId>
            <scope>test</scope>
        </dependency>
        <dependency>
            <groupId>org.mybatis.spring.boot</groupId>
            <artifactId>mybatis-spring-boot-starter-test</artifactId>
            <version>3.0.3</version>
            <scope>test</scope>
        </dependency>
        <!--连接池-->
        <dependency>
            <groupId>com.alibaba</groupId>
            <artifactId>druid-spring-boot-starter</artifactId>
            <version>1.1.10</version>
        </dependency>
    </dependencies>

    <build>
        <plugins>
            <plugin>
                <groupId>org.springframework.boot</groupId>
                <artifactId>spring-boot-maven-plugin</artifactId>
            </plugin>
        </plugins>
        <resources>
            <resource>
                <directory>src/main/java</directory>
                <includes>
                    <include>**/*.xml</include>
                </includes>
            </resource>
            <resource>
                <directory>src/main/resources</directory>
            </resource>
        </resources>
    </build>

</project>
yml文件配置
spring:
  datasource:
    type: com.alibaba.druid.pool.DruidDataSource
    druid:
      master:
        url: jdbc:mysql://localhost:3306/security?useUnicode=true&characterEncoding=UTF-8&serverTimezone=Asia/Shanghai
        username: root
        password:
        driver-class-name: com.mysql.cj.jdbc.Driver
      slave:
        url: jdbc:mysql://localhost:3306/springsecurity?useUnicode=true&characterEncoding=UTF-8&serverTimezone=Asia/Shanghai
        username: root
        password:
        driver-class-name: com.mysql.cj.jdbc.Driver
在这里可以看到设置了两个数据库,一个是security,一个是springsecurity
在这两个数据库里面创建两个相同的表结构Student,security数据库sql脚本如下;
create table student
(
    name    varchar(15) null,
    email   varchar(35) null,
    address varchar(15) null,
    age     int         null,
    id      int         null
);

INSERT INTO security.student (name, email, address, age, id) VALUES ('master', '3548297839@qq.com', '中国深圳', 18, null);
spring security数据库sql脚本如下;
create table student
(
    name    varchar(15) null,
    email   varchar(35) null,
    address varchar(15) null,
    age     int         null,
    id      int         null
);

INSERT INTO security.student (name, email, address, age, id) VALUES ('slave', '3548297839@qq.com', '中国深圳', 18, null);
mybatis-plus配置不做赘述,提供一个查询所以student的方法;
管理数据源:
我们应用ThreadLocal来管理数据源信息,通过其中内容的get,set,remove方法来获取、设置、删除当前线程对应的数据源,创建一个DataSourceContextHolder类
package com.example.springbootdynamic.config;

public class DataSourceContextHolder {
    private static final ThreadLocal<String> DATASOURCE_HOLDER = new ThreadLocal<>();

    /**
     * 获取当前线程的数据源
     *
     * @return 数据源名称
     */
    public static String getDataSource() {
        return DATASOURCE_HOLDER.get();
    }

    /**
     * 设置数据源
     *
     * @param dataSourceName 数据源名称
     */
    public static void setDataSource(String dataSourceName) {
        DATASOURCE_HOLDER.set(dataSourceName);
    }

    /**
     * 删除当前数据源
     */
    public static void removeDataSource() {
        DATASOURCE_HOLDER.remove();
    }
}
重置数据源:
创建 DynamicDataSource 类并继AbstractRoutingDataSource,这样我们就可以重置当前的数据库路由,实现切换成想要执行的目标数据库
package com.example.springbootdynamic.config;

import org.springframework.jdbc.datasource.lookup.AbstractRoutingDataSource;

import javax.sql.DataSource;
import java.util.Map;

public class DynamicDataSource extends AbstractRoutingDataSource {
    public DynamicDataSource(DataSource defaultDataSource, Map<Object, Object> targetDataSources) {
        /*
        通过调用父类的方法 setDefaultTargetDataSource和
        setTargetDataSources 来设置默认数据源和目标数据源映射关系
         */
        super.setDefaultTargetDataSource(defaultDataSource);
        super.setTargetDataSources(targetDataSources);
    }

    /**
     * 这一步是关键,获取注册的数据源信息
     * @return
     * 实现了动态数据源的功能,根据某个上下文中的数据源标识动态地选择目标数据源
     */
    @Override
    protected Object determineCurrentLookupKey() {
        return DataSourceContextHolder.getDataSource();
    }
}
注册多个数据源:
package com.example.springbootdynamic.config;

import com.alibaba.druid.spring.boot.autoconfigure.DruidDataSourceBuilder;
import org.springframework.boot.context.properties.ConfigurationProperties;
import org.springframework.context.annotation.Bean;
import org.springframework.context.annotation.Configuration;
import org.springframework.context.annotation.Primary;

import javax.sql.DataSource;
import java.util.HashMap;
import java.util.Map;

@Configuration
public class DateSourceConfig {
    @Bean
    @ConfigurationProperties(prefix = "spring.datasource.druid.master")
    public DataSource dynamicDatasourceMaster() {
        return DruidDataSourceBuilder.create().build();
    }

    @Bean
    @ConfigurationProperties(prefix = "spring.datasource.druid.slave")
    public DataSource dynamicDatasourceSlave() {
        return DruidDataSourceBuilder.create().build();
    }

    /*
    通常用于标识一个Bean定义为首选的候选项。当存在多个相同类型的Bean时,
    Spring容器会选择具有@Primary注解的Bean作为首选项
     */
    @Bean(name = "dynamicDataSource")
    @Primary
    public DynamicDataSource createDynamicDataSource() {
        Map<Object, Object> dataSourceMap = new HashMap<>();
        // 设置默认的数据源为Master
        DataSource defaultDataSource = dynamicDatasourceMaster();
        dataSourceMap.put("master", defaultDataSource);
        dataSourceMap.put("slave", dynamicDatasourceSlave());
        return new DynamicDataSource(defaultDataSource, dataSourceMap);
    }

}
启动类配置:
在启动类的@SpringBootApplication注解中排除DataSourceAutoConfiguration,否则会报错
package com.example.springbootdynamic;

import org.mybatis.spring.annotation.MapperScan;
import org.springframework.boot.SpringApplication;
import org.springframework.boot.autoconfigure.SpringBootApplication;
import org.springframework.boot.autoconfigure.jdbc.DataSourceAutoConfiguration;

@SpringBootApplication(exclude = DataSourceAutoConfiguration.class)
@MapperScan(basePackages = {"com.example.springbootdynamic.dao"})
public class SpringBootSpringBootDynamicApplication {

    public static void main(String[] args) {
        SpringApplication.run(SpringBootAffairsApplication.class, args);
    }
}
启动项目手动切换数据源测试:
这里我准备了一个接口来验证,传入的 datasourceName 参数值就是刚刚注册的数据源的key
package com.example.springbootdynamic.controller;

import com.example.springbootdynamic.config.DataSourceContextHolder;
import com.example.springbootdynamic.entity.Student;
import com.example.springbootdynamic.service.impl.StudentServiceImpl;
import jakarta.annotation.Resource;
import org.springframework.web.bind.annotation.GetMapping;
import org.springframework.web.bind.annotation.PathVariable;
import org.springframework.web.bind.annotation.RestController;

import java.util.List;

@RestController
public class DynamicSwitchController {
    @Resource
    private StudentServiceImpl studentService;

    @GetMapping("/switchDataSource/{datasourceName}")
    public String switchDataSource(@PathVariable("datasourceName") String datasourceName) {
        DataSourceContextHolder.setDataSource(datasourceName);
        List<Student> allStudent = studentService.getAllStudent();
        DataSourceContextHolder.removeDataSource();
        return allStudent.toString();
    }
}
测试结果:
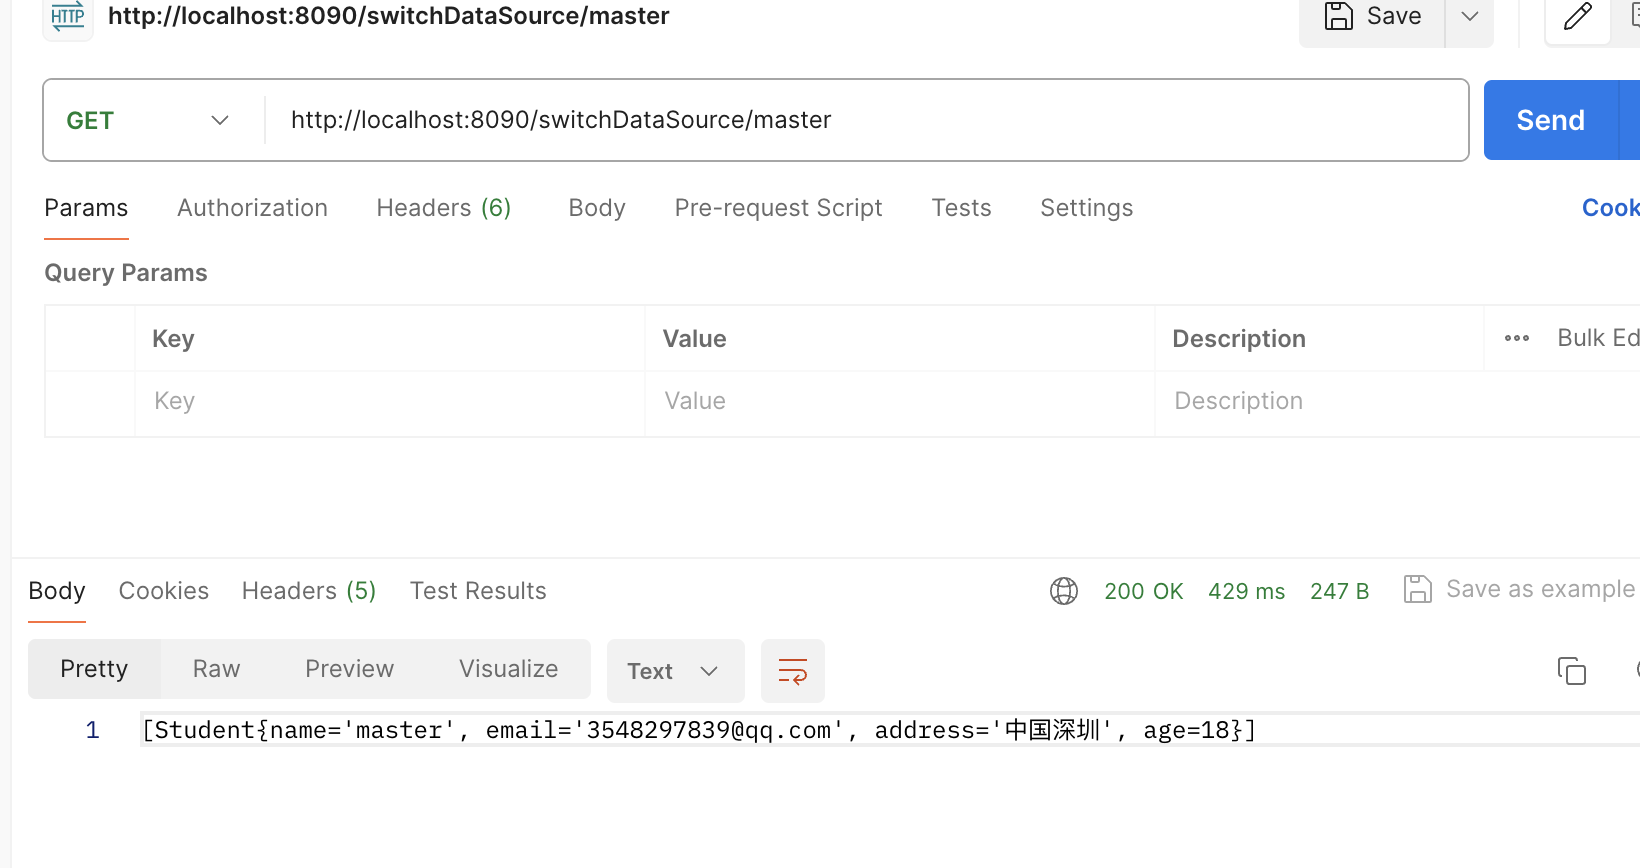
当我们路径是master查询的student结果是master
 当我们路径是slave查询的student结果是salve
至此通过执行结果,我们看到传递不同的数据源名称,已经实现了查询对应的数据库数据
注解实现切换数据源:
上边已经成功实现了手动切换数据源,但这种方式顶多算是半自动,我们每次都要通过传入参数来实现数据源的切换,我们可以利用SpringAop特性,通过注解来实现,下边我们来用注解实现切换数据源
定义注解:
package com.example.springbootdynamic.annotation;

import java.lang.annotation.*;

@Target({ElementType.METHOD, ElementType.TYPE})
@Retention(RetentionPolicy.RUNTIME)
@Documented
@Inherited
public @interface DataSelect {
    // 默认数据源
    String value() default "master";
}
实现AOP
定义了@DataSelect注解后,紧接着实现注解的AOP逻辑,拿到注解传递值,然后设置当前线程的数据源
package com.example.springbootdynamic.aopconfig;

import com.example.springbootdynamic.annotation.DataSelect;
import com.example.springbootdynamic.config.DataSourceContextHolder;
import org.aspectj.lang.ProceedingJoinPoint;
import org.aspectj.lang.annotation.Around;
import org.aspectj.lang.annotation.Aspect;
import org.aspectj.lang.annotation.Pointcut;
import org.aspectj.lang.reflect.MethodSignature;
import org.springframework.stereotype.Component;

import java.lang.reflect.Method;
import java.util.Objects;

@Component
@Aspect
public class DSAspect {


    @Pointcut("@annotation(com.example.springbootdynamic.annotation.DataSelect)")
    public void dynamicDataSource() {
    }


    @Around("dynamicDataSource()")
    public Object datasourceAround(ProceedingJoinPoint point) throws Throwable {
        MethodSignature signature = (MethodSignature) point.getSignature();
        Method method = signature.getMethod();
        DataSelect ds = method.getAnnotation(DataSelect.class);
        if (Objects.nonNull(ds)) {
            DataSourceContextHolder.setDataSource(ds.value());
        }
        try {
            return point.proceed();
        } finally {
            DataSourceContextHolder.removeDataSource();
        }
    }

}
测试注解
再添加两个接口测试,使用@DataSelect注解标注,使用不同的数据源名称,内部执行相同的查询条件,看看结果如何?
package com.example.springbootdynamic.controller;

import com.example.springbootdynamic.annotation.DataSelect;
import com.example.springbootdynamic.config.DataSourceContextHolder;
import com.example.springbootdynamic.entity.Student;
import com.example.springbootdynamic.service.impl.StudentServiceImpl;
import jakarta.annotation.Resource;
import org.springframework.web.bind.annotation.GetMapping;
import org.springframework.web.bind.annotation.PathVariable;
import org.springframework.web.bind.annotation.RestController;

import java.util.List;

@RestController
public class DynamicSwitchController {
    @Resource
    private StudentServiceImpl studentService;

    @GetMapping("/switchDataSource/{datasourceName}")
    public String switchDataSource(@PathVariable("datasourceName") String datasourceName) {
        DataSourceContextHolder.setDataSource(datasourceName);
        List<Student> allStudent = studentService.getAllStudent();
        DataSourceContextHolder.removeDataSource();
        return allStudent.toString();
    }

    @DataSelect
    @GetMapping("/getStudentInSecurity")
    public String getStudentBySecurity() {
        List<Student> allStudent = studentService.getAllStudent();
        return allStudent.toString();
    }

    @DataSelect(value = "slave")
    @GetMapping("/getStudentInSpringSecurity")
    public String getStudent() {
        List<Student> allStudent = studentService.getAllStudent();
        return allStudent.toString();
    }
}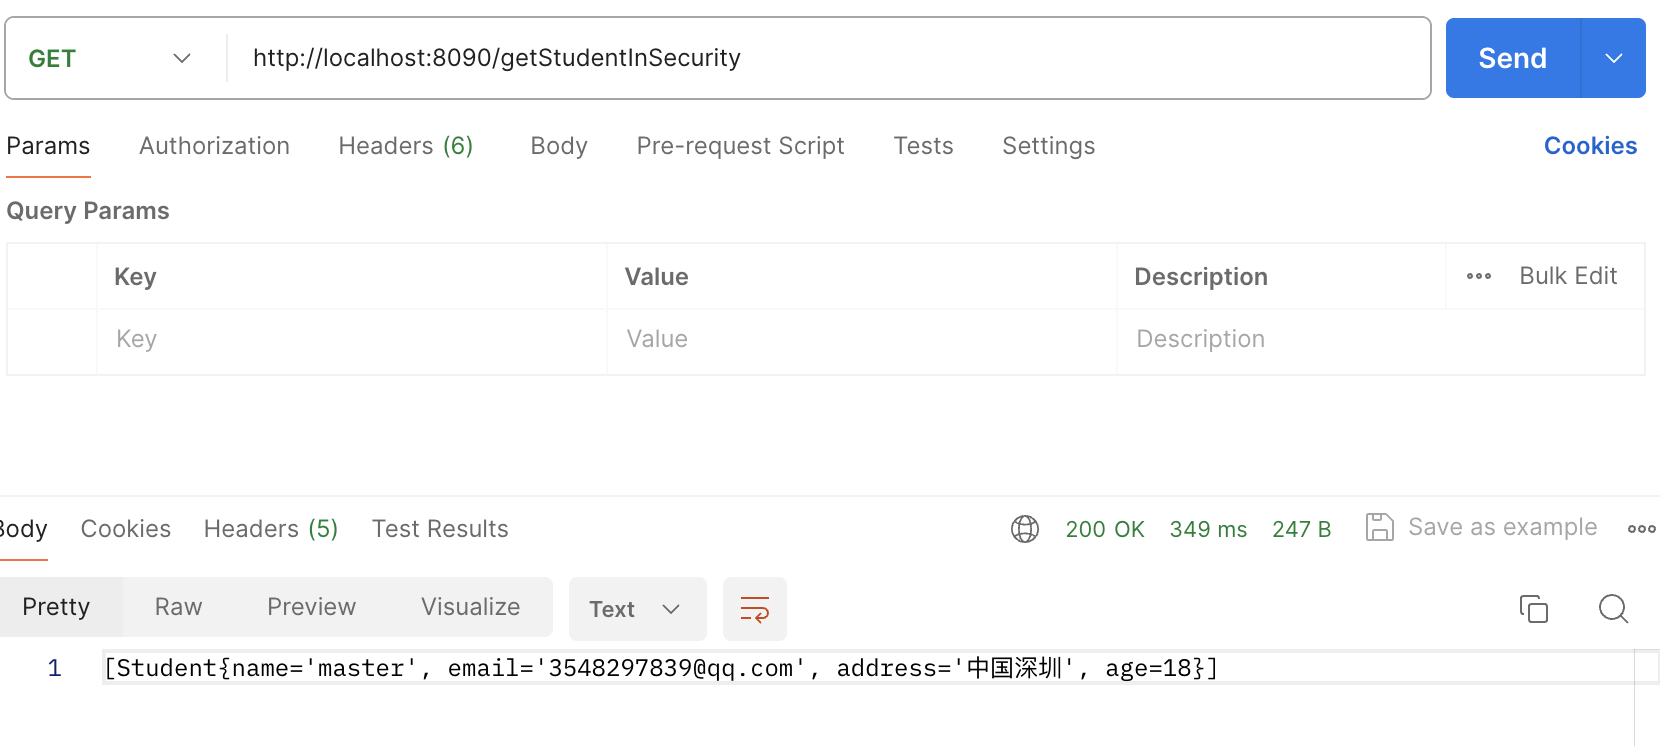
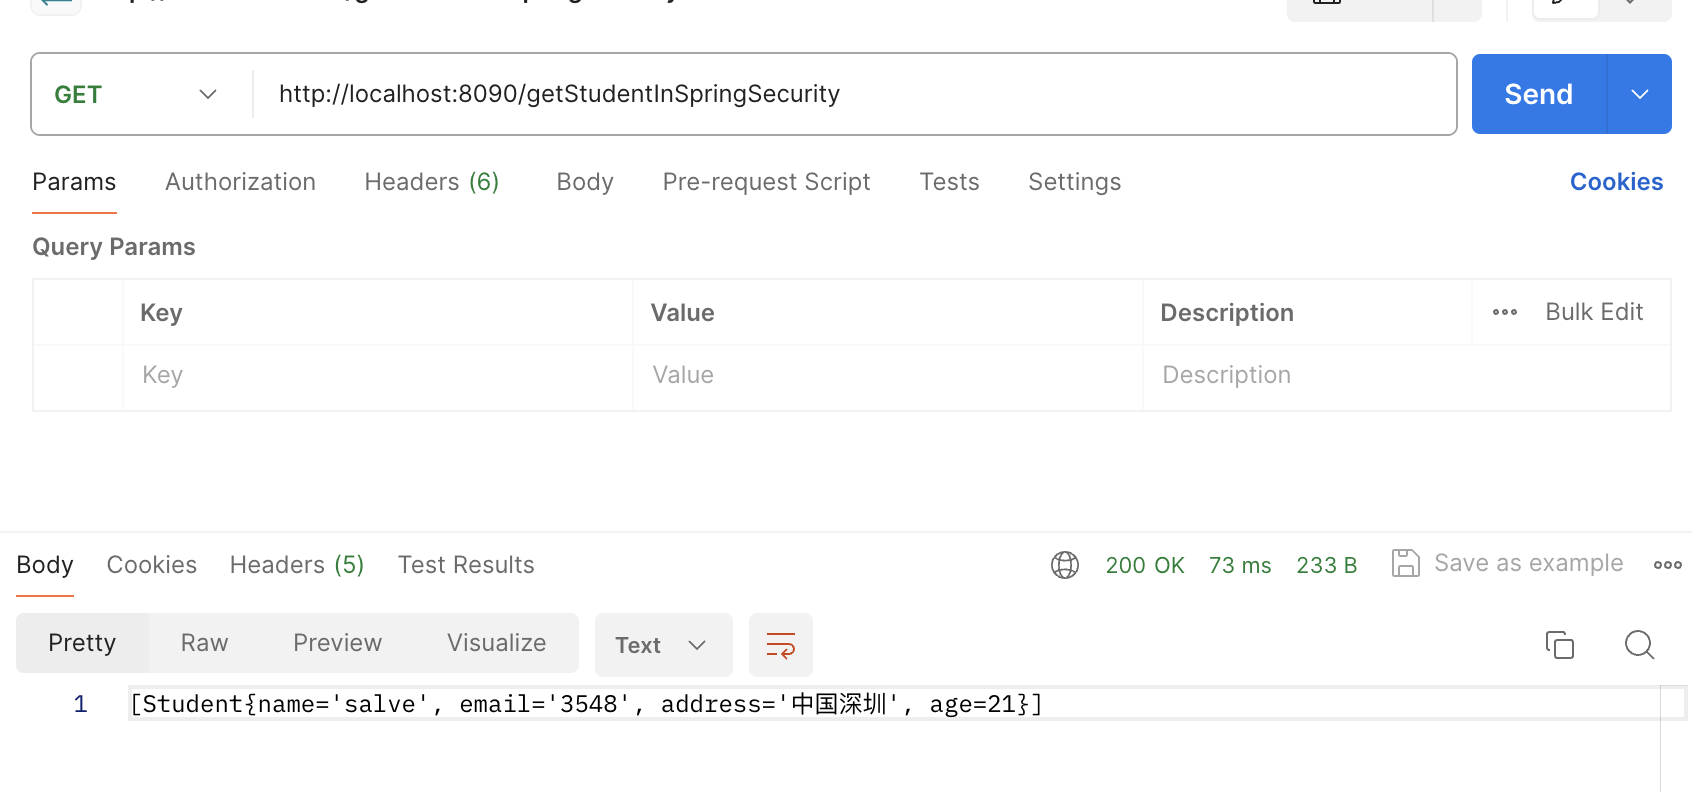 通过执行结果,看到通过应用@DataSelect注解也成功的进行了数据源的切换